#!/bin/bash
#---server---
# vlc -vvv /tmp/video.avi --sout '#transcode{vcodec=DIV3,vb=256,scale=1,acodec=mp3,ab=32,channels=2}:std{access=mmsh,mux=asfh,dst=:8080}' &
# vlc -vvv --loop /tmp/video.avi --sout '#transcode{vcodec=DIV3,vb=1024,scale=1,acodec=mp3,ab=32,channels=2}:std{access=mmsh,mux=asfh,dst=:8080}' &
vlc -vvv --loop /tmp/clip.avi --sout '#transcode{vcodec=DIV3,vb=1024,scale=1,acodec=mp3,ab=32,channels=2}:std{access=mmsh,mux=asfh,dst=:8080}' &
vlc -vvv --loop /tmp/clip.avi --sout '#transcode{vcodec=DIV3,vb=1024,scale=1,width=320,height=240,acodec=mp3,ab=32,channels=2}:std{access=mmsh,mux=asfh,dst=:8080}' &
#---client---
sleep 3
vlc mmsh://127.0.0.1:8080
Can play with Windows Explorer by specifying URL as:
mms://192.168.2.3:8080
29 April, 2009
24 April, 2009
AutoStart VM with Xen
I've been evaluating Xen, VirtualBox, and VMware as part of work. We require a system to autoboot virtual machines as a feature of the virtualization technology we choose. I just found how to autoboot using Xen and thought it worthy of a quick post.
You can test this by restarting the xendomain service as follows:
# mkdir /etc/xen/auto
# ln -s /etc/xen/mymachine.cfg /etc/xen/auto/
You can test this by restarting the xendomain service as follows:
# /etc/init.d/xendomains stop
16 April, 2009
Xen 3.0 Installation - Debian 4.0
This morning I started my investigation of using Xen virtualization, this post will focus on the installation of Xen and the steps to create my first WinXp Professional guest OS.
Xen Installation
This installation took place on a Debian 4.0 AMD 64 distribution, with VT-X hardware support:
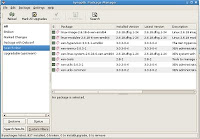
Our journey begins by installing the appropriate Xen Debian packages using Synaptic; following is a screen shot of the packages I installed.
Install the above packages using Synaptic or apt-get; whichever you prefer.
After completing the installation of these packages, you'll need to reboot. You'll find that a new Xen-based kernel image has been installed and should be defined as the default boot image. You'll notice that some Xen-specific logging prior to the Linux boot sequence. After completion, you should boot to a familiar looking system....login prompt and similar desktop as you've grown to love.
WinXp Guest Installation
You should now be ready to install your first guest operating system. Xen refers to these as domains...really don't care as every other virtualization technology calls them virtual machines and I'll be sticking with that terminology.
If you're familiar with VirtualBox, or VMware you'll quickly notice that Xen configuration is less user-friendly. Gone are the GUI configuration utilities, gone are the virtual machine status displays, and gone are the single-click access to virtual machine consoles. No worries though, we'll work with what the good Xen developers gave us.
Guest OS Installation Media
The installation procedures I referenced made use of an ISO image of the WinXp installation cd. How exactly you'd do this with live media is left as an exercise to the reader :)
I created a raw copy of the WinXp Installation CD by using the dd utility as follows:
Note, you must unmount the cdrom BEFORE issuing this command.
Creation of the Virtual Machine Hard-Drive File System
# mkdir /home/xen/domains/win01
# dd if=/dev/zero of=/home/xen/domains/win01/win_vm.img bs=1M count=2048
Creation of Virtual Machine Configuration File
While the user-friendly configuration user interfaces are non-existant, you still have available a highly configurable virtual machine. Configuration is done by a text based configuration file that you must create prior to starting the machine. I used the following for my WinXp guest operating system installation. You'll need to create this as root in the specified directory.
Note, that the disk field specifies a hard-drive file system image and the OS installation ISO image. First time booting of this VM will kick off the installation from the ISO image.
Booting the VM
You should now be ready to start the VM. You start (or create) the VM by issuing the following command:
Pay special attention to the -c argument, otherwise this thing may fail silently. You should get a started win01
response from this command.
You next need to know how to query the status of the VM and connect to the VM console. You can query the status of running virtual machines by issuing the command:
This status tells you general info, but at this point you want to pay special attention to the ID as it is how you will connect to the VM.
VNC is integrated into Xen VMs and this is the means to connect to the machine. The VM ID indirectly tells you what port to connect to (by adding 5900+ID). You can connect to this machine by issuing:
During the installation process the machine reboots a couple times, each time a new ID is assigned so when you lose your connection repeat the xm list + vncviewer sequence again.
That's all for now.
Xen Installation
This installation took place on a Debian 4.0 AMD 64 distribution, with VT-X hardware support:
user@debian:~$ cat /proc/cpuinfo
processor       : 0
vendor_id       : GenuineIntel
cpu family      : 6
model           : 15
model name      : Intel(R) Core(TM)2 CPU         L7400  @ 1.50GHz
stepping        : 6
cpu MHz         : 1234.565
cache size      : 4096 KB
physical id     : 0
siblings        : 1
core id         : 0
cpu cores       : 1
fpu             : yes
fpu_exception   : yes
cpuid level     : 10
wp              : yes
flags           : fpu tsc msr pae mce cx8 apic mtrr mca cmov pat pse36 clflush dts acpi mmx fxsr sse sse2 ss ht tm syscall nx lm constant_tsc pni monitor ds_cpl vmx est tm2 cx16 xtpr lahf_lm
bogomips        : 3180.78
clflush size    : 64
cache_alignment : 64
address sizes   : 36 bits physical, 48 bits virtual
power management:

processor       : 1
vendor_id       : GenuineIntel
cpu family      : 6
model           : 15
model name      : Intel(R) Core(TM)2 CPU         L7400  @ 1.50GHz
stepping        : 6
cpu MHz         : 1234.565
cache size      : 4096 KB
physical id     : 1
siblings        : 1
core id         : 0
cpu cores       : 1
fpu             : yes
fpu_exception   : yes
cpuid level     : 10
wp              : yes
flags           : fpu tsc msr pae mce cx8 apic mtrr mca cmov pat pse36 clflush dts acpi mmx fxsr sse sse2 ss ht tm syscall nx lm constant_tsc pni monitor ds_cpl vmx est tm2 cx16 xtpr lahf_lm
bogomips        : 3180.78
clflush size    : 64
cache_alignment : 64
address sizes   : 36 bits physical, 48 bits virtual
power management:
user@debian:~$ egrep '^flags.*(vmx|svm)' /proc/cpuinfo
flags           : fpu tsc msr pae mce cx8 apic mtrr mca cmov pat pse36 clflush dts acpi mmx fxsr sse sse2 ss ht tm syscall nx lm constant_tsc pni monitor ds_cpl vmx est tm2 cx16 xtpr lahf_lm
flags           : fpu tsc msr pae mce cx8 apic mtrr mca cmov pat pse36 clflush dts acpi mmx fxsr sse sse2 ss ht tm syscall nx lm constant_tsc pni monitor ds_cpl vmx est tm2 cx16 xtpr lahf_lm
Our journey begins by installing the appropriate Xen Debian packages using Synaptic; following is a screen shot of the packages I installed.

Install the above packages using Synaptic or apt-get; whichever you prefer.
After completing the installation of these packages, you'll need to reboot. You'll find that a new Xen-based kernel image has been installed and should be defined as the default boot image. You'll notice that some Xen-specific logging prior to the Linux boot sequence. After completion, you should boot to a familiar looking system....login prompt and similar desktop as you've grown to love.
WinXp Guest Installation
You should now be ready to install your first guest operating system. Xen refers to these as domains...really don't care as every other virtualization technology calls them virtual machines and I'll be sticking with that terminology.
If you're familiar with VirtualBox, or VMware you'll quickly notice that Xen configuration is less user-friendly. Gone are the GUI configuration utilities, gone are the virtual machine status displays, and gone are the single-click access to virtual machine consoles. No worries though, we'll work with what the good Xen developers gave us.
Guest OS Installation Media
The installation procedures I referenced made use of an ISO image of the WinXp installation cd. How exactly you'd do this with live media is left as an exercise to the reader :)
I created a raw copy of the WinXp Installation CD by using the dd utility as follows:
Note, you must unmount the cdrom BEFORE issuing this command.
$ dd if=/dev/scd0 of=/home/user/WinXpPro.iso
Creation of the Virtual Machine Hard-Drive File System
# mkdir /home/xen/domains/win01
# dd if=/dev/zero of=/home/xen/domains/win01/win_vm.img bs=1M count=2048
Creation of Virtual Machine Configuration File
While the user-friendly configuration user interfaces are non-existant, you still have available a highly configurable virtual machine. Configuration is done by a text based configuration file that you must create prior to starting the machine. I used the following for my WinXp guest operating system installation. You'll need to create this as root in the specified directory.
debian:~# cat /etc/xen/win01.cfg
kernel = '/usr/lib/xen-3.0.3-1/boot/hvmloader'
builder = 'hvm'
memory = '1024'
device_model='/usr/lib/xen-3.0.3-1/bin/qemu-dm'

# Disks
disk = [ 'file:/home/xen/domains/win01/win_vm.img,ioemu:hda,w',
'file:/home/user/WinXpPro.iso,ioemu:hdc:cdrom,r' ]

# Hostname
name='win01'

# Networking
vif = ['type=ioemu, bridge=xenbr0']

# Behaviour
boot='d'
vnc=1
vncviewer=1
vncunused=0
sdl=0
debian:~#
Note, that the disk field specifies a hard-drive file system image and the OS installation ISO image. First time booting of this VM will kick off the installation from the ISO image.
Booting the VM
You should now be ready to start the VM. You start (or create) the VM by issuing the following command:
# xen create win01.cfg -c
Pay special attention to the -c argument, otherwise this thing may fail silently. You should get a started win01
response from this command.
You next need to know how to query the status of the VM and connect to the VM console. You can query the status of running virtual machines by issuing the command:
debian:~# xm list
Name                                      ID Mem(MiB) VCPUs State   Time(s)
Domain-0                                   0      947     2 r-----    457.1
win01                                      3     1024     1 -b----     17.6
debian:~#
This status tells you general info, but at this point you want to pay special attention to the ID as it is how you will connect to the VM.
VNC is integrated into Xen VMs and this is the means to connect to the machine. The VM ID indirectly tells you what port to connect to (by adding 5900+ID). You can connect to this machine by issuing:
$user@debian:~$ vncviewer 127.0.0.1:5903
During the installation process the machine reboots a couple times, each time a new ID is assigned so when you lose your connection repeat the xm list + vncviewer sequence again.
That's all for now.
15 April, 2009
Starting VirtualBox as a Service
I've been trying to compare VirtualBox features with VMware Server 2.0. One of the first features that doesn't exist (without some work) is the concept of auto-starting virtual machines at system start-up.
With head-less virtual machine modes and RDP connectivity, it appears that all the core features exist.
By incorporating the starting of virtual machines in head-less modes as a service that is started at system start-up you'd have the equivalent of VMware Server. This post will document the means to do just that.
First, since system start-up is executed by root, the virtual machine will need to be associated with the root user. You can accomplish this by firing up VirtualBox interactively and create the desired virtual machines. I, however, had the virtual machines I wanted to start created in an alternative user account, so I created a soft-link between the root user home directory and the user directory (keep you security concerns to yourself, this is simply proof of concept).
Next, create a script that serves as the necessary service daemon:
Note that this script has hard-coded virtual machine named WinXp; again, this is proof of concept. Please keep in mind, this isn't a complete service script solely enough to demonstrate the ability of introducing a service into system start-up.
You can test the script behavior can by invoking:
To incorporate this into the system start-up, you first find what runlevel you are currently running:
Shows run-level 2; meaning that the service must reside in /etc/rc2.d
Changing to /etc/rc2.d you add the service by creating a soft-link to /root/VBoxD with a prefix S followed by a 2-digit numeric (the larger the numeric the later the service is started). In this example, I created S91VBoxD as follows:
If you've properly enabled RDP for this machine at port 3389 you should be able to connect to the head-less virtual machine by:
With head-less virtual machine modes and RDP connectivity, it appears that all the core features exist.
By incorporating the starting of virtual machines in head-less modes as a service that is started at system start-up you'd have the equivalent of VMware Server. This post will document the means to do just that.
First, since system start-up is executed by root, the virtual machine will need to be associated with the root user. You can accomplish this by firing up VirtualBox interactively and create the desired virtual machines. I, however, had the virtual machines I wanted to start created in an alternative user account, so I created a soft-link between the root user home directory and the user directory (keep you security concerns to yourself, this is simply proof of concept).
# cd /root
# ln -s /home/user/.VirtualBox .VirtualBox
Next, create a script that serves as the necessary service daemon:
#!/bin/bash
# scriptName: VBoxD

VBOXHEADLESS="/usr/bin/VBoxHeadless"

vbox_start() {
  echo "...starting $1" >> /var/tmp/myLog
  $VBOXHEADLESS -s $1 > /dev/null &
}

#---main---
case "$1" in
  start)
    echo "...starting my service" >> /var/tmp/myLog
    logger -p user.notice "starting service"
    vbox_start WinXp
  ;;
  stop)
    echo "...stopping my service" >> /var/tmp/myLog
    logger -p user.notice "stopping service"
  ;;
  restart)
    echo "...restarting my service" >> /var/tmp/myLog
  ;;
esac

exit 0
Note that this script has hard-coded virtual machine named WinXp; again, this is proof of concept. Please keep in mind, this isn't a complete service script solely enough to demonstrate the ability of introducing a service into system start-up.
You can test the script behavior can by invoking:
# ./VBoxD start
# ./VBoxD stop
To incorporate this into the system start-up, you first find what runlevel you are currently running:
# ps -aef | grep init
root         1     0  0 20:23 ?        00:00:00 init [2]
root      5047  4725  0 20:58 pts/0    00:00:00 grep init
Shows run-level 2; meaning that the service must reside in /etc/rc2.d
Changing to /etc/rc2.d you add the service by creating a soft-link to /root/VBoxD with a prefix S followed by a 2-digit numeric (the larger the numeric the later the service is started). In this example, I created S91VBoxD as follows:
xion:/etc/rc2.d# ls -l S91VBoxD
lrwxrwxrwx 1 root root 11 2009-04-12 19:47 S91VBoxD -> /root/VBoxD
If you've properly enabled RDP for this machine at port 3389 you should be able to connect to the head-less virtual machine by:
$ rdesktop 127.0.0.1:3389
14 April, 2009
VirtualBox Command Line Commands
Assuming you have created a virtual machine called WinXp can start the machine in a headless mode (non-gui) by invoking the command:
To shutdown the virtual machine, you can invoke the command
VBoxHeadless --startvm WinXp
To shutdown the virtual machine, you can invoke the command
VBoxManage controlvm WinXp poweroff
Creating CD-ROM ISO Image - the cowboy way
I've been investigating installation of Xen for work, in the process I thought it would be useful to rather than run around with the WinXp installation disk to create an ISO image of it for installation purposes.
The utility 'dd' suits the bill, you have to first interface directly with the device driver so the cd cannot be mounted. If the cd is mounted, I'd first recommend finding the device driver reference by issuing the mount command:
As you can see, this was an external cdrom on /dev/scd0.
Next, issue the appropriate dd command:
The arguments if=/dev/scd0 tells dd to read from the device in raw format, of=WinXpInstall.iso specifies the output file.
You'll be left with an exact image of what resides on the cd, use at your leisure.
The utility 'dd' suits the bill, you have to first interface directly with the device driver so the cd cannot be mounted. If the cd is mounted, I'd first recommend finding the device driver reference by issuing the mount command:
$ mount
. . .
/dev/scd0 on /media/cdrom0 . . . ..
$ umount /media/cdrom0
As you can see, this was an external cdrom on /dev/scd0.
Next, issue the appropriate dd command:
$ dd if=/dev/scd0 of=WinXpProInstall.iso
The arguments if=/dev/scd0 tells dd to read from the device in raw format, of=WinXpInstall.iso specifies the output file.
You'll be left with an exact image of what resides on the cd, use at your leisure.
13 April, 2009
Installing VirtualBox 2.2
I've been evaluating VirtualBox, comparing it to VMware Server.
One of my first discoveries is the extent of changes since VirtualBox OSE 1.6.6, the verified package of Debian.
I found it not to be worthwhile in comparing 1.6.6 to VMware 2.0 since the feature set has significantly evolved and it wouldn't be a fair comparison comparing the latest version of VMware to VirtualBox development months old.
First step; update the Debian sources to make VirtualBox 2.2 available. Start by editing the /etc/apt/sources.list, adding the line
Start the interactive UI by invoking the command:
One of my first discoveries is the extent of changes since VirtualBox OSE 1.6.6, the verified package of Debian.
I found it not to be worthwhile in comparing 1.6.6 to VMware 2.0 since the feature set has significantly evolved and it wouldn't be a fair comparison comparing the latest version of VMware to VirtualBox development months old.
First step; update the Debian sources to make VirtualBox 2.2 available. Start by editing the /etc/apt/sources.list, adding the line
deb http://download.virtualbox.org/virtualbox/debian/ etch non-free
# apt-get update
# apt-get install virtualbox-2.2
Start the interactive UI by invoking the command:
$ VirtualBox
10 April, 2009
VMware Remote Console -- Command Line
I've been investigating thin-client connectivity to virtual machines with VMware Server 2.0.
While the console available through the web interface is pretty responsive, I've got a need to restrict the VM configuration from the user. I figured there was a means to kick off the console independent of the web interface, but hadn't found it...'til now.
That'll start a full screen console where VMware Server is running locally. Should apply remotely as well, but does require installation of the VDI on the client (i.e. connect via the web interface at least once).
Cool Beans.
While the console available through the web interface is pretty responsive, I've got a need to restrict the VM configuration from the user. I figured there was a means to kick off the console independent of the web interface, but hadn't found it...'til now.
/home/user/.mozilla/firefox/6lk37syc.default/extensions/VMwareVMRC@vmware.com/plugins/vmware-vmrc -X -h localhost:8333 -u vmadmin -p adminpassword "[standard] WinXp/WinXp.vmx"
That'll start a full screen console where VMware Server is running locally. Should apply remotely as well, but does require installation of the VDI on the client (i.e. connect via the web interface at least once).
Cool Beans.
07 April, 2009
Timing VM Startup Script
In my previous post I eluded to creating a script for timing the starting of a virtual machine.
This is it, use at your leisure:
This is it, use at your leisure:
#!/bin/csh

set i=0
while ( $i < starttime="`date" addr="192.168.2.24" response="1" response ="=">> /dev/null
  set response=$status
end
set stopTime=`date +%s`

set secs=`expr $stopTime - $startTime`
echo "startUp: $secs (secs)"

sleep 10
vmrun -T 127.0.0.1 -h 'https://127.0.0.1:8333/sdk' -u vmadmin -p 'vmadminpassword' stop "[standard] JltvWinXp/JltvWinXp.vmx"
set i=`expr $i + 1`
end

The script loops 5 times to get a crude sampling.  Each iteration, the virtual machine is started then monitored via a ping until the VM is pingable.  It then sleeps some 10 seconds before commanding the virtual machine to shutdown.
06 April, 2009
VmRun Command
I've been recently tailoring a WinXp virtual machine to accelerate the OS initialization. To measure the impacts I've created a script that repeatedly times the starting of the VM. In particular, I'm measuring how long it takes between initiated startup and the time it takes before I can ping the virtual machine.
The first challenge was to decode the vmware-cmd (now vmrun) syntax. The following is an example of how you can start a virtual machine.
The first challenge was to decode the vmware-cmd (now vmrun) syntax. The following is an example of how you can start a virtual machine.
vmrun -T 127.0.0.1 -h 'https://127.0.0.1:8333/sdk' -u vmadmin -p 'vmadminpassword' start "[standard] JltvWinXp/JltvWinXp.vmx"
05 April, 2009
Querying Unix Time
Just a quick post of a useful feature of querying the Unix time (seconds since Epoch) that I find useful in various scripts.
I'm posting it because time and again I find the need to use it and repeatedly spend time re-looking up what the syntax consists of.
I'm posting it because time and again I find the need to use it and repeatedly spend time re-looking up what the syntax consists of.
$ date +%s
1227918465
03 April, 2009
External USB Disk - NTFS Mount
In my last post I eluded to purchasing an Seagate FreeAgent Xtreme external hard-drive and was woefully disappointed in the inability to mount it from Linux and gain write permissions. This is how I resolved it for Debian 4.0 - AMD64 distro.
I 'fixed' this by reformatting the drive as a FAT32 file system which technically resolved the issue, but FAT32 didn't support my needs as I needed to store large files (5+ Gigs) on the drive.
I later found that if I installed the ntfs-3g driver and mounted it using this file system type that I could in fact read and write to the drive.
Adding this line:
Followed by:
then, define the mount point and edit the /etc/fstab as follows:
and add this line to /etc/fstab
Ta-Da.
I 'fixed' this by reformatting the drive as a FAT32 file system which technically resolved the issue, but FAT32 didn't support my needs as I needed to store large files (5+ Gigs) on the drive.
I later found that if I installed the ntfs-3g driver and mounted it using this file system type that I could in fact read and write to the drive.
# vi /etc/apt/sources.list
Adding this line:
deb http://www.backports.org/debian etch-backports main
Followed by:
# apt-get update
# apt-get install ntfs-3g
then, define the mount point and edit the /etc/fstab as follows:
# mkdir /media/usbdisk
and add this line to /etc/fstab
/dev/sdc1 /media/usbdisk ntfs-3g rw,user,noauto 0 0
# mount /media/usbdisk
Ta-Da.
Subscribe to:
Posts (Atom)