11 September, 2010

Journey of Android Development -- Install/Reinstall/Uninstall Apps

As I've mentioned in previous posts, I'm starting along a journey of developing applications for the Android phone. I figure I'll likely post some of my findings along the way for your amusement.

The first thing I was kinda surprised at was the fact that the Android Emulators are persistent, meaning that if you install an application it persists through emulator power cycle. Sure, sure it's certainly understandable that they are attempting to emulate a true phone which persists through power cycle but I was surprised this was the default behavior.

The relevance is that in the fashion of incremental development you'll find yourself coding a little, testing a little,... That manner requires you to install your app numerous times for testing. You'll quickly find that you need to uninstall the previous version to install the latest.

You install your app by applying a command similar to the following:

user@debian:~/Buttons$ adb -s emulator-5554 install ./bin/Buttons-debug.apk
98 KB/s (4384 bytes in 0.043s)
pkg: /data/local/tmp/Buttons-debug.apk
Success


An attempt to reinstall will fail due to the application already existing.

user@debian:~/Buttons$ adb -s emulator-5554 install ./bin/Buttons-debug.apk
98 KB/s (4384 bytes in 0.043s)
pkg: /data/local/tmp/Buttons-debug.apk
Failure [INSTALL_FAILED_ALREADY_EXISTS]


You can remedy that by forcing an overwrite.

user@debian:~/Buttons$ adb -s emulator-5554 install -r ./bin/Buttons-debug.apk
95 KB/s (4384 bytes in 0.044s)
pkg: /data/local/tmp/Buttons-debug.apk
Success


Alternatively, you can remove the application explicitly

user@debian:~/Buttons$ adb shell rm data/app/com.example.buttons.apk

08 September, 2010

Installing Windows XP Unattended with VirtualBox

If you're like me you find that you may wish to experiment with clean installations of WinXp VMs from time to time. Sometimes you wish to modify the VM settings that must be assigned prior to OS installation. Sometimes you just want a clean slate to start from. And other times you've got nothing else to do and "God help you" you just plain love installing operating systems in your spare time. Well, if any of this is true and you'd like to know how to install without baby-sitting this post is for you.

The overall intent is that you can install Xp unattended if you properly populate an answer file on a floppy disk. The installation pulls the specifications from the answer file (winnt.sif).

Step 1 – Creating a Virtual Floppy Disk
user@xion:~$ dd bs=512 count=2880 if=/dev/zero of=~/.VirtualBox/HardDisks/floppy01.img
user@xion:~$ /sbin/mkfs.msdos ~/.VirtualBox/HardDisks/floppy01.img
You may need to install dosfstools package.

http://untitledfinale.wordpress.com/2007/10/09/create-mount-and-copy-floppy-disks-images-under-linux/

Step 2 – Create the Virtual Machine
user@xion:~$ VBoxManage createvm --name AutoInstallXp --register --ostype "WindowsXP"

user@xion:~$ VBoxManage modifyvm AutoInstallXp --memory 1024 --vram 16 --boot1 dvd --boot2 floppy --boot3 disk


Step 3 – Create Hard Drive
user@xion:~$ VBoxManage createhd --filename AutoInstallXp.vdi --size 10240
user@xion:~$ VBoxManage openmedium disk AutoInstallXp.vdi

Step 4 – Attach Hard Disk
user@xion:~$ VBoxManage storagectl AutoInstallXp --add ide --name "Storage Controller"

user@xion:~$ VBoxManage storageattach AutoInstallXp --storagectl "Storage Controller" --port 0 --device 0 --type hdd --medium AutoInstallXp.vdi

user@xion:~$ VBoxManage storageattach AutoInstallXp --storagectl "Storage Controller" --port 0 --device 1 --type dvddrive --medium HardDisks/WinXpInstall.iso

Step 5 – Add Floppy Disk
user@xion:~$ VBoxManage storagectl AutoInstallXp --add floppy --name "Floppy Controller"

user@xion:~$ VBoxManage storageattach AutoInstallXp --storagectl "Floppy Controller" --port 0 --device 0 --type fdd --medium ~/.VirtualBox/HardDisks/floppy01.img

Step 6 – Populate Unattended Answer File
Copy the example answer file to the floppy image and update the ProductKey field value. This can be done by mounting the floppy image as root and copying the contents as follows:
# mount -o loop .VirtualBox/HardDisks/floppy01.img /mnt
# cp winnt.sif /mnt
# cat /tmp/winnt.sif
;SetupMgrTag
[Data]
AutoPartition=1
MsDosInitiated="0"
UnattendedInstall="Yes"
AutomaticUpdates="Yes"

[Unattended]
UnattendMode=FullUnattended
OemSkipEula=Yes
OemPreinstall=No
TargetPath=\WINDOWS
Repartition=Yes
UnattendSwitch=Yes
AutoActivate=Yes

[GuiUnattended]
AdminPassword=*
EncryptedAdminPassword=NO
OEMSkipRegional=1
TimeZone=20
OemSkipWelcome=1

[UserData]
ProductKey=XXXXX-XXXXX-XXXXX-XXXXX-XXXXX
FullName="personal"
OrgName="nona ur business"
ComputerName=WinXp

[GuiRunOnce]
; Command0=%SystemRoot%\system32\cmd.exe

[Identification]
JoinWorkgroup=WORKGROUP

[Networking]
InstallDefaultComponents=Yes

[Display]
BitsPerPel=8
XResolution=1024
YResolution=768
Flags=0
AutoConfirm=1


Step 7 – Add CDRom
user@xion:~$ dd if=/dev/sr0 of=~/.VirtualBox/HardDisks/WinXpInstall.iso
user@xion:~$ VBoxManage openmedium dvd WinXpInstall.iso
user@xion:~$ VBoxManage storageattach AutoInstallXp --storagectl "Storage Controller" --port 0 --device 1 --type dvddrive --medium HardDisks/WinXpInstall.iso

Step 8 – Start the VM
user@xion:~$ VBoxManage startvm AutoInstallXp

05 September, 2010

Stitching Mpeg Videos Together

Start with a video stream captured from your good 'ole television and you'll likely wanna remove the commercials. This act essentially requires you to split the video, less the commercials, into segments and them stitching them back together.

Relatively easy, break into video segments (minus the commercials)


$ ffmpeg -i Desktop/Futureweapons\ -\ \'\'Maximum\ Impact\'\'\ \(Recorded\ May\ 4\,\ 2006\,\ DSC\).mpg -ss 0 -t 10 /var/tmp/out1.mpg
$ ffmpeg -i Desktop/Futureweapons\ -\ \'\'Maximum\ Impact\'\'\ \(Recorded\ May\ 4\,\ 2006\,\ DSC\).mpg -ss 10 -t 10 /var/tmp/out2.mpg


Now stitch them together, using the 'cat' utility:

$ cat /var/tmp/out1.mpg /var/tmp/out2.mpg > /var/tmp/out.mpg


Simple.

01 September, 2010

Android Development Setup -- Debian 5.0 Amd64

I've touted in previous posts that I've recently got a Samsung Galaxy phone, equipped with Android 2.1. The decision was pretty easy as I wanted an Android-based phone to develop applications for.

I'm embarking on establishing the development environment and thought it would be useful to record the steps.

I'm starting with a fresh installation of Debian 5.0 as a VirtualBox Guest. Before we delve into the Android setup I first installed the VirtualBox Additions to get better control of my mouse and keyboard. While not required directly by the Android development they're useful, but only applicable if you're running VirtualBox.

VirtualBox Additions Installation

# apt-get install gcc linux-headers-`uname -r` build-essential


Then select Devices->Install VirtualBox Additions to mount the disc image.

I've always had trouble running the installation script directly from the disc, so I have had to introduce an incremental step of copying to the file system before running.

# cp /media/cdrom0/VBoxLinuxAdditions-amd64.run /tmp
# /tmp/VBoxLinuxAdditions-amd64.run


Then reboot the system for the additions to take effect.

Now the preliminaries are complete, let's get to installing the Android development environment.

Install Sun Java
Update you're repository to utilize the non-free Sun packages.

# echo "deb http://ftp.de.debian.org/debian/ lenny main contrib non-free" >> /etc/apt/sources.list
# apt-get update
# apt-get install sun-java6-jdk sun-java6-jre


Since I'm running an AMD64 kernel I need to install the 32-bit libaries.

# apt-get install ia32-libs


Lastly, you need to ensure you're running the Sun Java utilities and not the Gcc versions. To ensure this, remove any unnecessary Gcc Java packages and ensure the symbolic links for the relevant Java utilities are pointing to the Sun packages.

# apt-get remove gcj-jdk
# update-alternatives --config javac
# update-alternatives --config java

On each of the update-alternatives ensure the selection is pointed toward the .../java-6-sun/... version. This killed me in my first attempt as the symbolic reference for the 'java' utility was pointing to '/usr/lib/jvm/java-gcj/jre/bin/java' and bad things happened (e.g. Null References when installing Android targets). Moral of the story, "check this".

Android SDK installation
Alright, we're ready to install the SDK having set up the Java environment.

Notice I'm running as a general user and will be installing in my home directory.


$ wget http://dl.google.com/android/android-sdk_r06-linux_86.tgz
$ tar -xvf ./android-sdk_r06-linux_86.tgz


Next, install the platforms by issuing the following command and selecting "SDK Platform Android 2.1 API 7, revision 1' (in my case anyway as my Galaxy is a Android 2.1 based). Then select the 'install' button. Then, exit as we'll proceed on with the command line.

user@debian:~$ ./android-sdk-linux_86/tools/android update sdk


You'll next need to create an Android Virtual Device. Note, the target 6 specifies an Android 2.1 target, applicable for my phone.

$ ./android-sdk-linux_86/tools/android create avd --target 6 --name myAvd


Create a new Android project by issuing the following command:

$ $ ./android-sdk-linux_86/tools/android create project --package com.example.helloandroid --activity HelloAndroid --target 2 --path ~/HelloAndroid


You'll find the example primed with a main routine:

user@debian:~$ cat /home/user/HelloAndroid/src/com/example/helloandroid/HelloAndroid.java
package com.example.helloandroid;

import android.app.Activity;
import android.os.Bundle;

public class HelloAndroid extends Activity
{
/** Called when the activity is first created. */
@Override
public void onCreate(Bundle savedInstanceState)
{
super.onCreate(savedInstanceState);
setContentView(R.layout.main);
}
}


Now you're ready to compile this no-op application and run in the emulator.

This is the point I realized that Android development requires Ant, so I installed the package.


# apt-get install ant


You'll see that a build.xml file exists, the source for the Ant build.

user@debian:~$ cd /home/user/HelloAndroid/
user@debian:~/HelloAndroid$ ls
AndroidManifest.xml build.xml local.properties
bin default.properties res
build.properties libs src


Build the target by issuing 'ant debug' from the project directory.

user@debian:~/HelloAndroid$ pwd
/home/user/HelloAndroid
user@debian:~/HelloAndroid$ ant debug


The result is an *.apk file in the bin directory; this is the executable you'll be running in the emulator.

Running in the Emulator
You're last steps are to start the AVD and install the application within it.

Start the AVD by issuing the android tool, selecting the AVD, and clicking on the start button. In a few seconds you should get a virtual phone presented on the screen.

$ /home/user/android-sdk-linux_86/tools/android


In another window/terminal, you can list the available devices by issuing the following command. You should be met with a list that includes the AVD you just started.

$ /home/user/android-sdk-linux_86/tools/adb devices


Almost there; final steps are to install your app and run it.

user@debian:~/HelloAndroid$ /home/user/android-sdk-linux_86/tools/adb -s emulator-5554 install ./bin/HelloAndroid-debug.apk


Running the application just like you would on your phone, navigate to the applications and click on it.
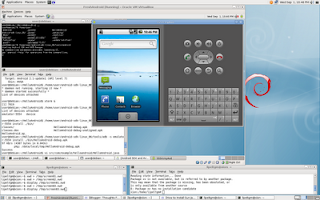
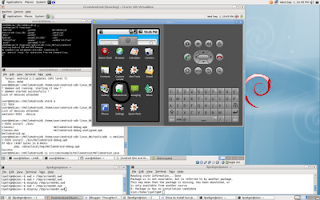
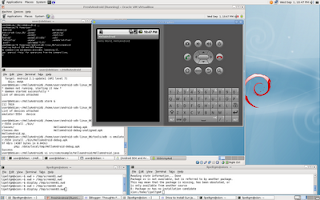


As you can see, you get a 'Hello World, HelloAndroid' on the screen. Not too exciting. If you're interested, and you should be, you'll find the text reference in the ~/HelloAndroid/res/layout/main.xml file.

Keep your stick on the ice.

Ellusive 'Error: java.lang.NullPointerException' for Android Development Installation

I just spent some time debugging why my android development setup was failing on Debian 5.0

I repeatedly got a "XML verification failed for https://dl-ssl.google.com/android/repository/repository.xml.Error: java.lang.NullPointerException" error.

After navigating to the referenced web site and confirmed it wasn't a web site mis-reference I consulted Google.

A couple forums elluded to updating the SDK and Java, but neither was the case for me. My problem was I failed to configure the Sun packages as the default java compiler. This is done by:

debian:/root# update-alternatives --config java

There are 3 alternatives which provide `java'.

Selection Alternative
-----------------------------------------------
1 /usr/bin/gij-4.3
*+ 2 /usr/lib/jvm/java-gcj/jre/bin/java
3 /usr/lib/jvm/java-6-sun/jre/bin/java

Press enter to keep the default[*], or type selection number: 3
Using '/usr/lib/jvm/java-6-sun/jre/bin/java' to provide 'java'.


Next issue a SDK update by issuing the 'android update sdk' command and install the targets.

The symptom of this issue was an unpopulated target list (e.g. 'android list targets' resulting in no targets available).

Kudos.

18 August, 2010

New Phone

Well ladies (and gentlmen),
I've moved into the 21st century and replaced my old cell phone with a smart phone. Really wasn't too much of a question when selecting as my criteria was an Android-based phone. Settled in on the Samsung Galaxy and couldn't be much happier. The only issue I've noticed is the wireless doesn't work for 802.11N and haven't had a chance to get it to connect to our wireless router at home.

Anyway....I figured I'd play with converting videos for the phone, the intent of this post. As always, FFMpeg is our tool:


$ ffmpeg -i ./Tosh-001.mpg -s qcif -vcodec h263 -ac 1 -ar 8000 -r 25 -ab 12.2k -y outputfile.3gp


Mount the phone, copy in the output file, unmount and play through the gallery. Easy-peezy.

16 July, 2010

Easing System Setup with Debian Packages

Seems like every 6 months or so I feel like reinstalling Linux on my workstation. Not because I need to, but more because I want to.

Seems as my interests wander I find the need to install loads of packages for temporary tasks, once accomplished I want to remove them. Unfortunately, I don't keep track of the packages and as a result start a-fresh periodically.

I do it often enough that it doesn't take too much time. Much of it is just the identification and reinstallation of packages I regularly use.

Authoring a system installation package that identifies all my essential packages as a dependency seems as it would minimize this effort dramatically. Since packages can define dependencies and installing it can auto-resolve and install the required dependencies seems like if we authored a faux package with dependencies on the packages I want installed we'd be right on mark.

Let's start;

Start by creating a directory.

$ mkdir ~/myPackage


Next, create the necessary control file which will identify the dependencies.

$ mkdir ~/myPackage/DEBIAN
$ edit ~/myPackage/DEBIAN/control

Populate ~/myPackage/DEBIAN/control with the following:
Package: MyPackage
Version: 1.0
Section: web
Priority: optional
Architecture: all
Essential: no
Depends: gnuplot, tcl
Pre-Depends: gnuplot
Recommends:
Suggests:
Installed-Size: 1024
Maintainer: Joe Brockmeier [jzb@dissociatedpress.net]
Conflicts: wile-e-coyote
Replaces: sam-sheepdog
Provides: acme
Description: The description can contain free-form text
describing the function of the program, what
kind of features it has, and so on.

Pay special attention to the Depends: field, it's populated with tcl and gnuplot. That means, when we install this package we ask that these dependencies are installed as well.

Next, create the package by executing the following command:

$ dpkg -b ~/myPackage /tmp/myPackage.deb


All set, now just install the package as root and you'll achieve an indirect installation of the dependencies.


# gdebi /tmp/myPackage.deb


Cheers.